Adding reCAPTCHA to the Widget
This article provides an overview of the process of adding reCAPTCHA to the VerifiedEmail widget.
- Prepare your environment. In this step, you will:
- Sign up for a Google account if necessary.
- Create or select a Google Cloud project.
- Enable the reCAPTCHA Enterprise API for the project.
- Configure roles and permissions. As directed in the document linked above, be sure to grant yourself the following IAM roles on the project:
- reCAPTCHA Enterprise Admin
- reCAPTCHA Enterprise Agent
- Create a score-based reCAPTCHA key.
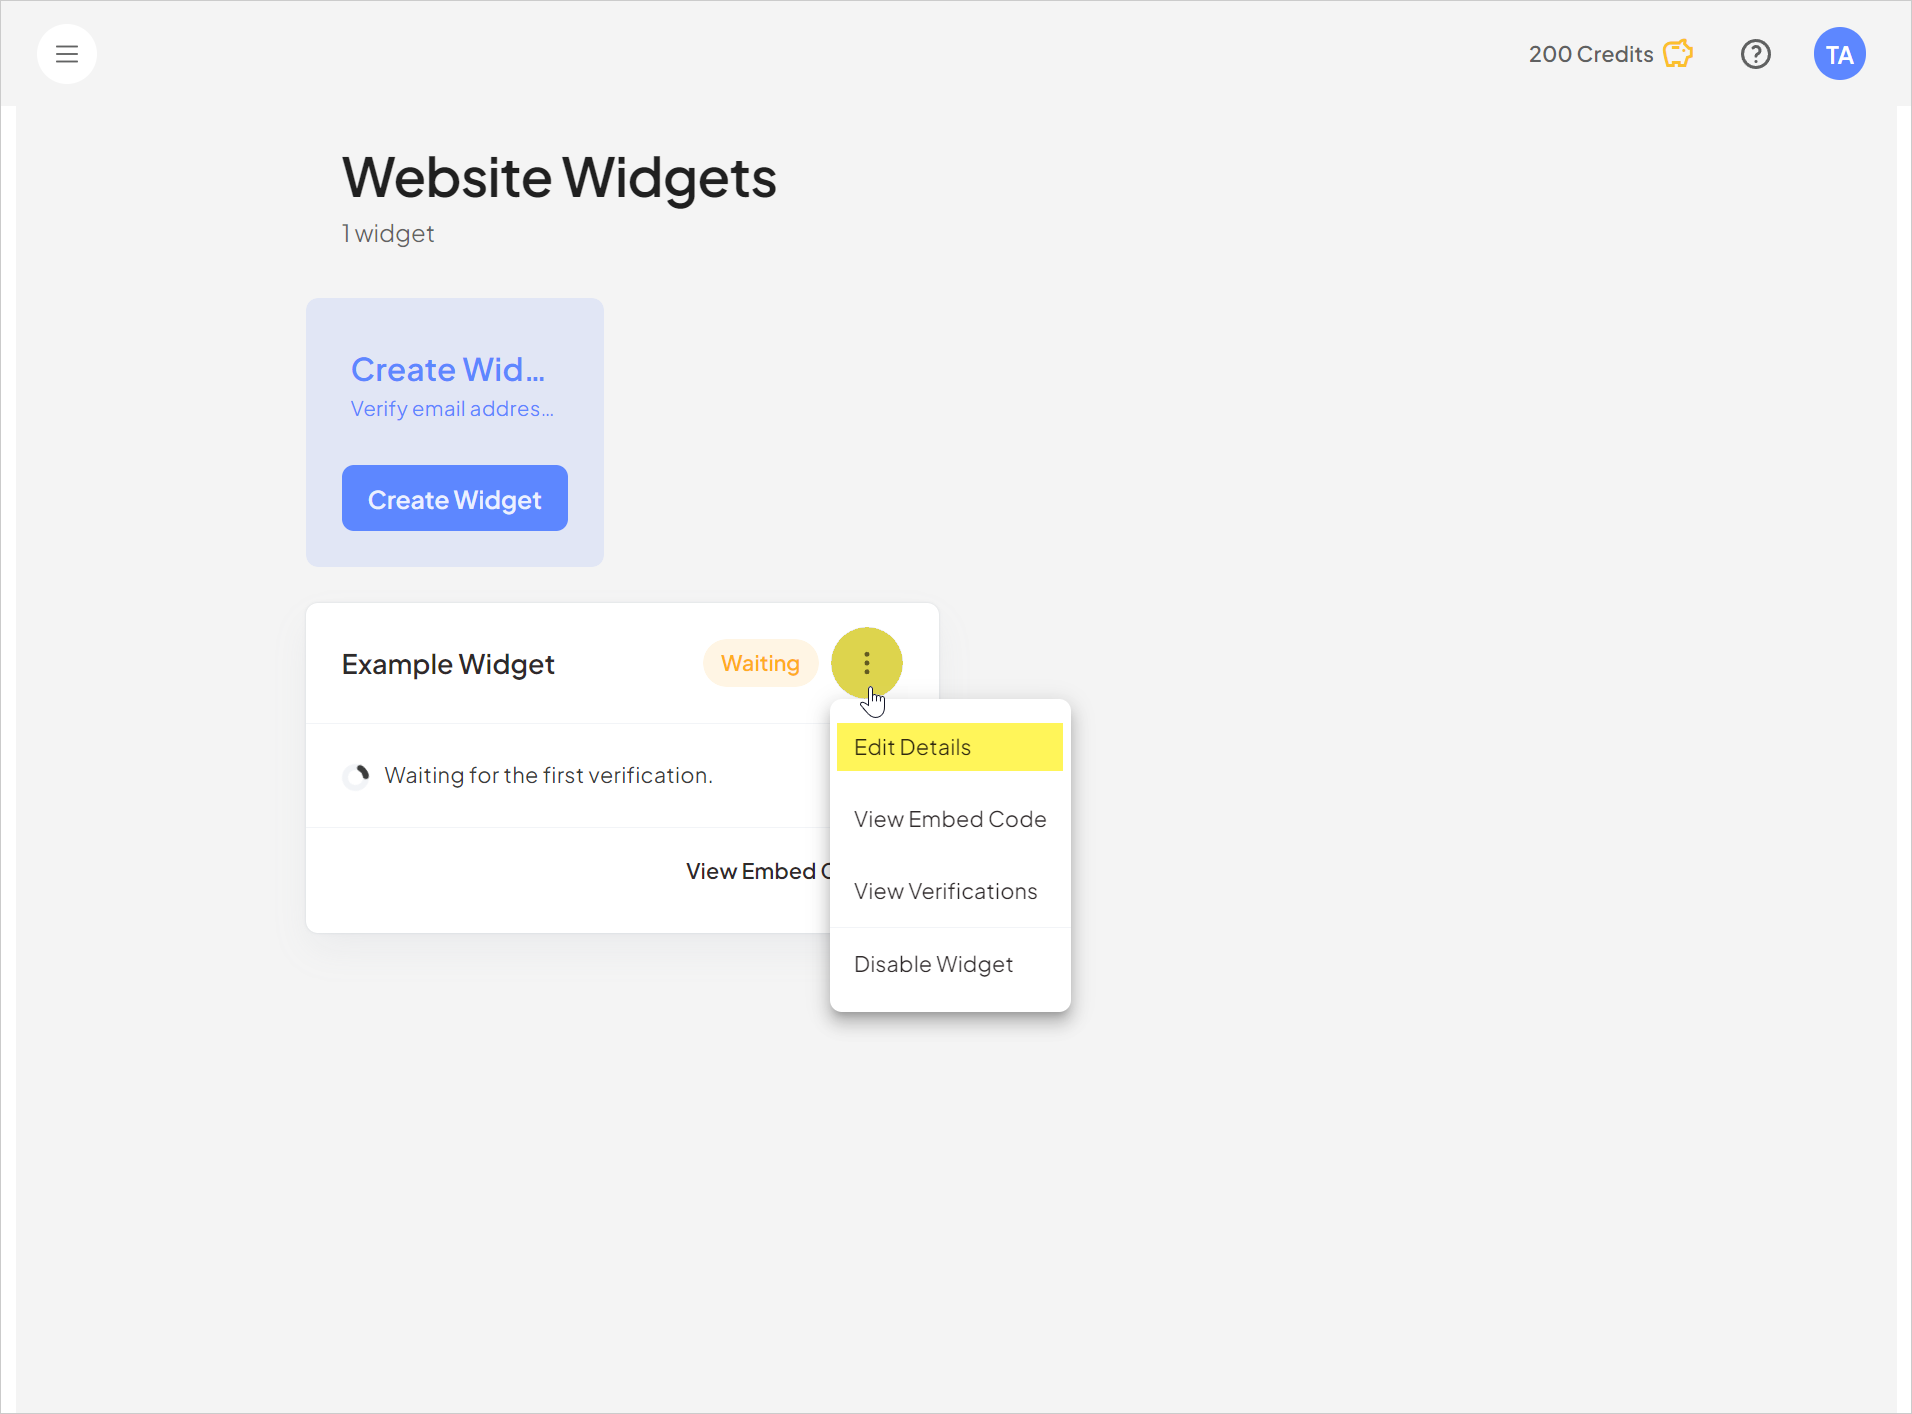
- On the VerifiedEmail Widgets page, click the triple dot button in the widget to which you want to add reCAPTCHA, and select Edit Details.
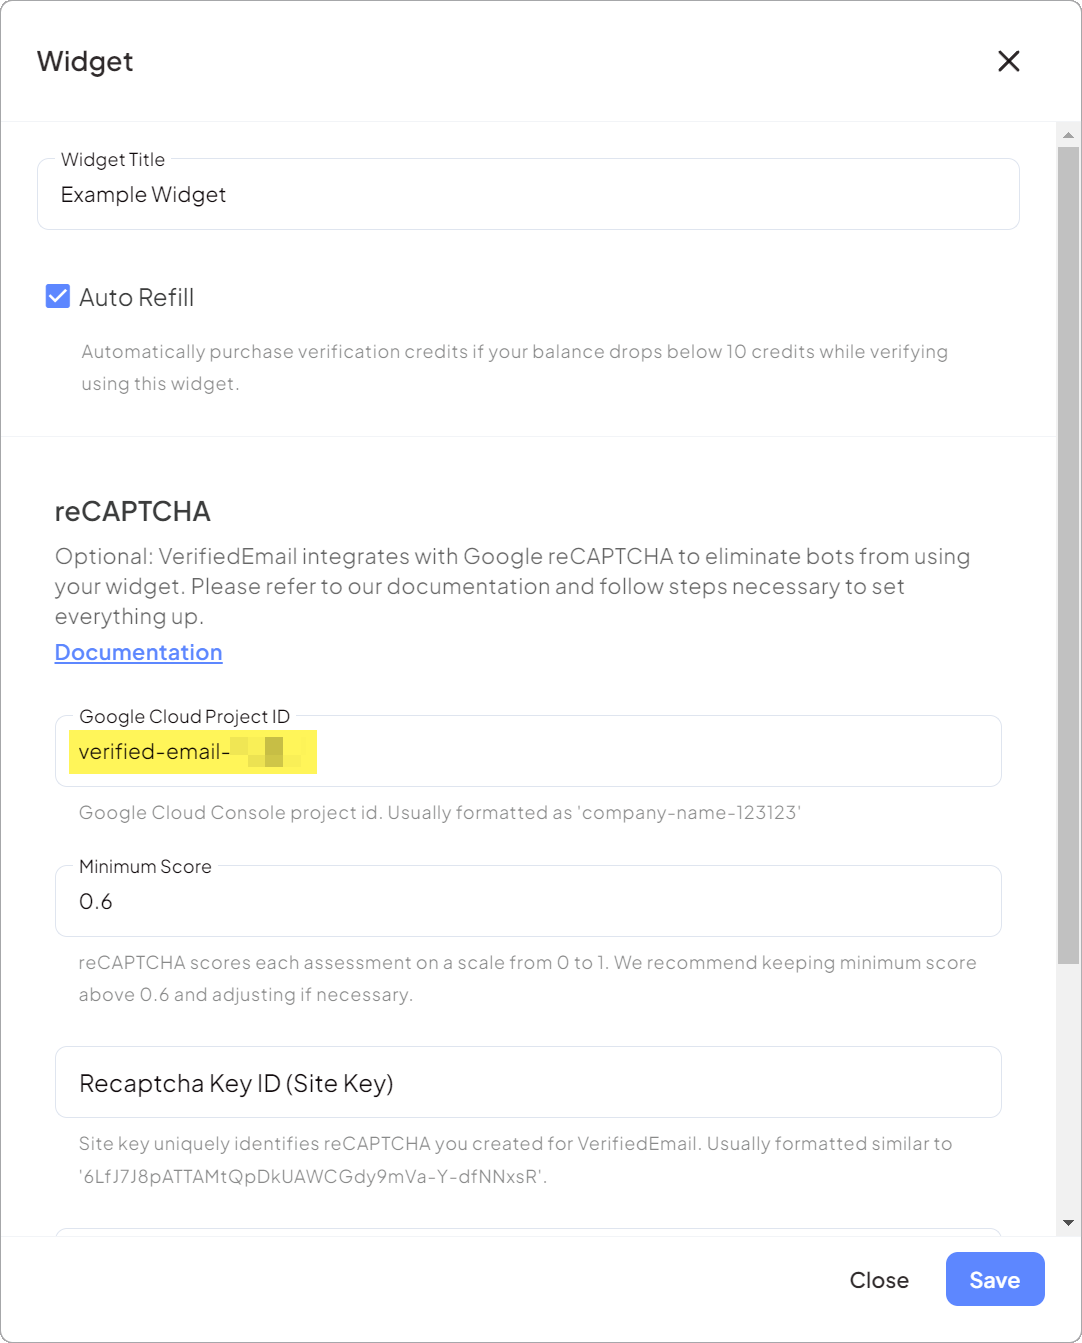
- Copy and paste your Google Cloud Project ID into the designated field.
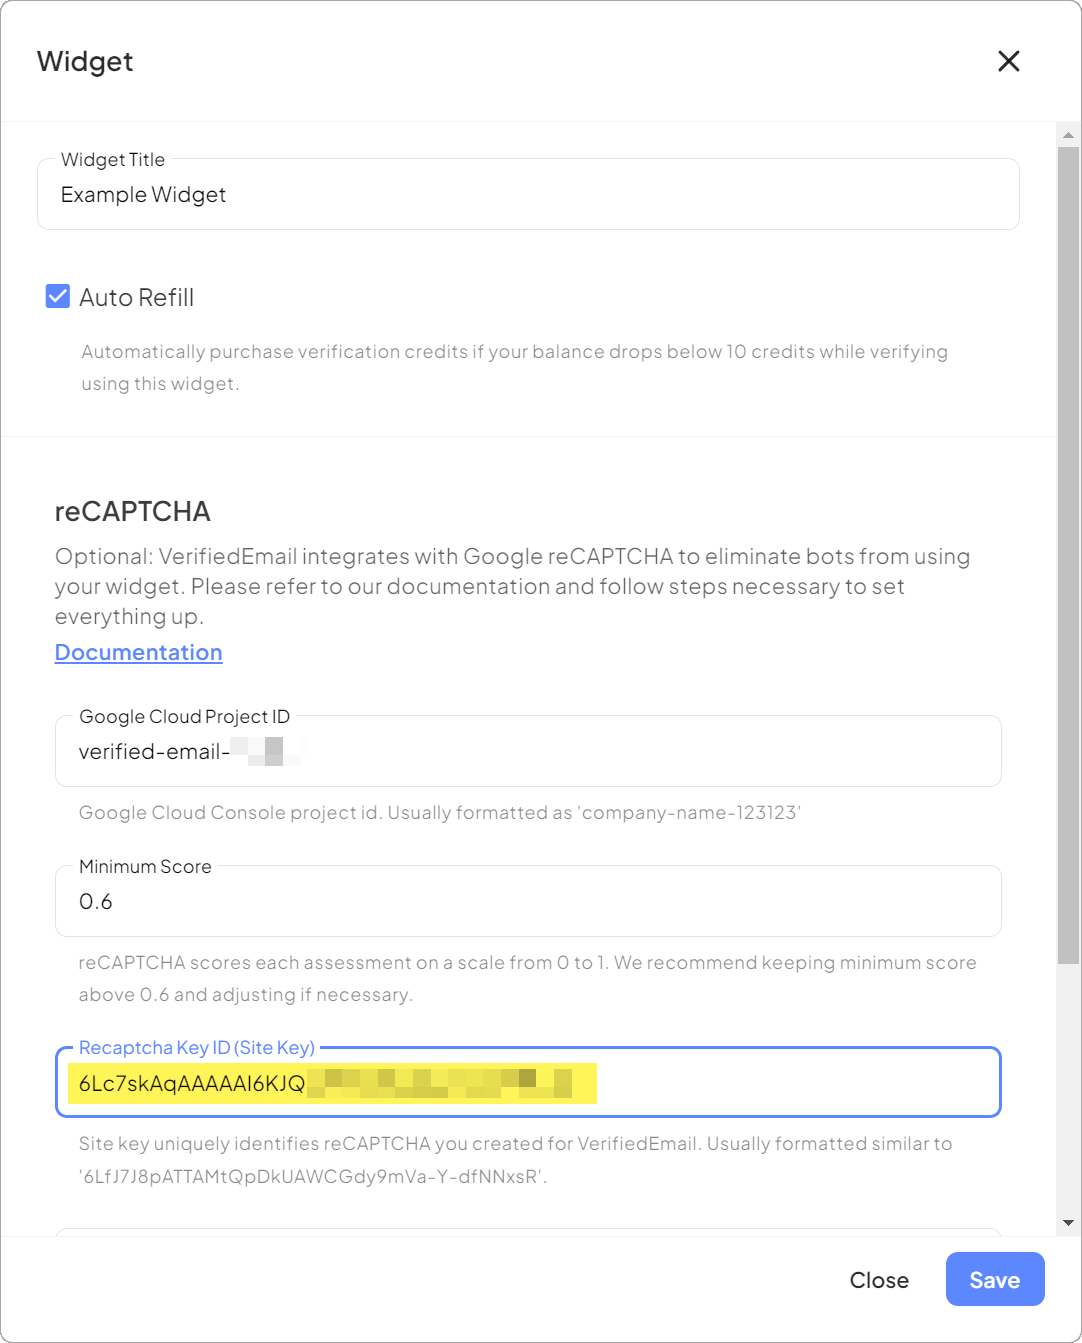
- Copy the score-based reCAPTCHA key to the Recaptcha Key ID (Site Key) field.
- Create a service account: https://cloud.google.com/iam/docs/service-accounts-create.
- Create a service account key: https://cloud.google.com/iam/docs/keys-create-delete.
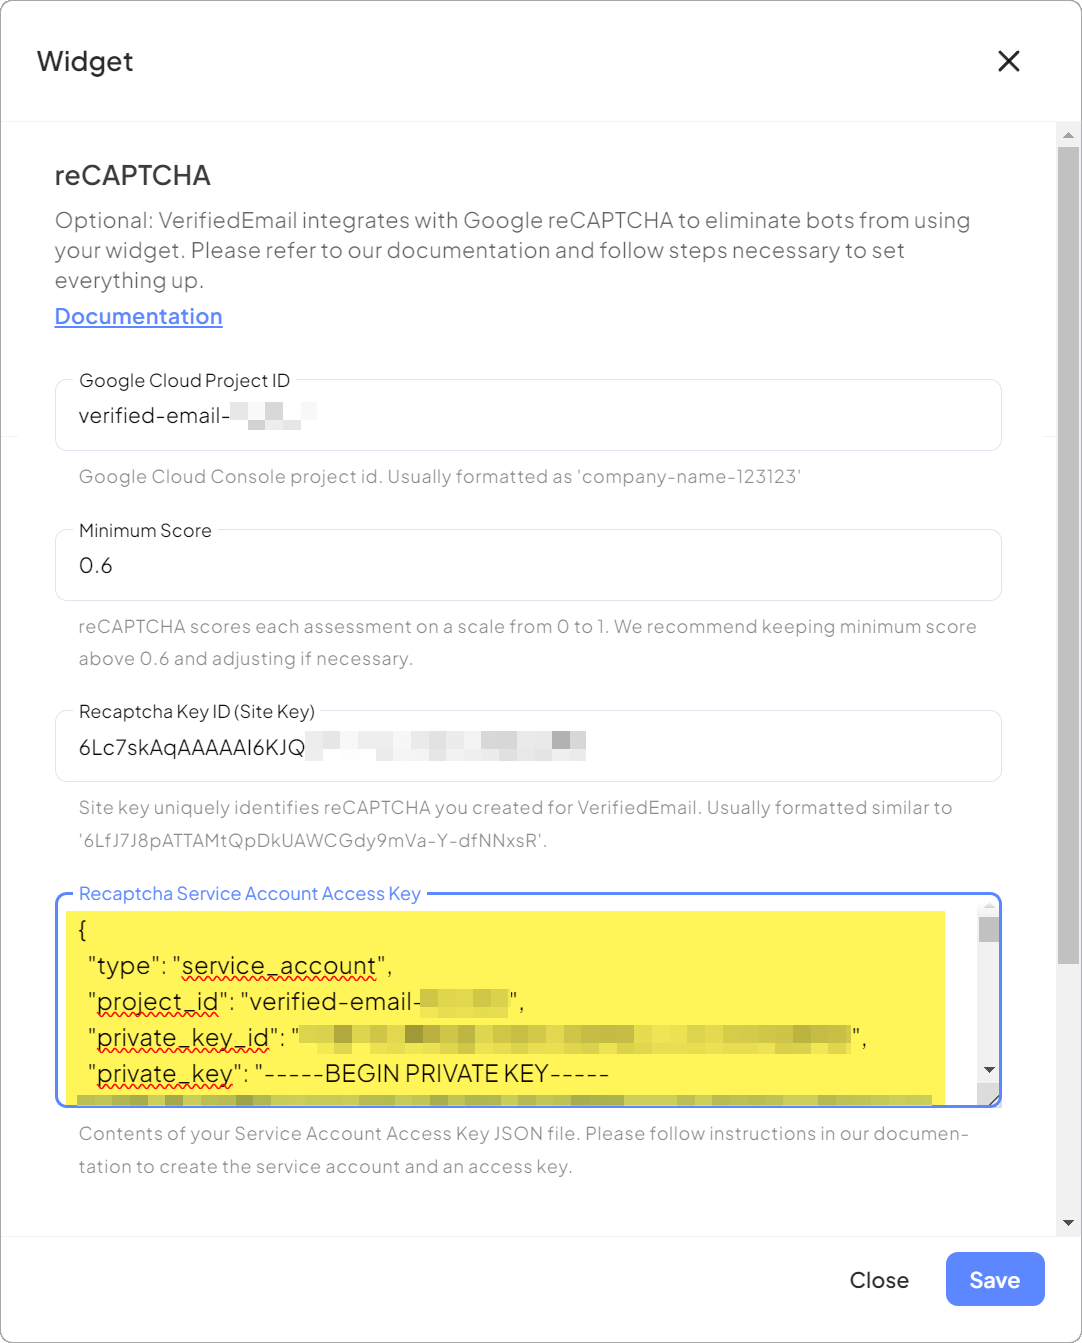
- Download the JSON file and store its contents in Recaptcha Service Key.
- Click Save. If you have not already done so, follow the steps provided in the next dialog to embed the widget on your website.


