Website Widgets
On the Website Widgets page, you can administer your VerifiedEmail website widgets. Website widgets let you add code to your web pages to verify email addresses entered by your visitors. Depending upon the implementation you choose, if address verification is not successful (e.g., if a user enters an invalid email address), you can reject the address and require the user to enter a valid one.
Creating a Widget
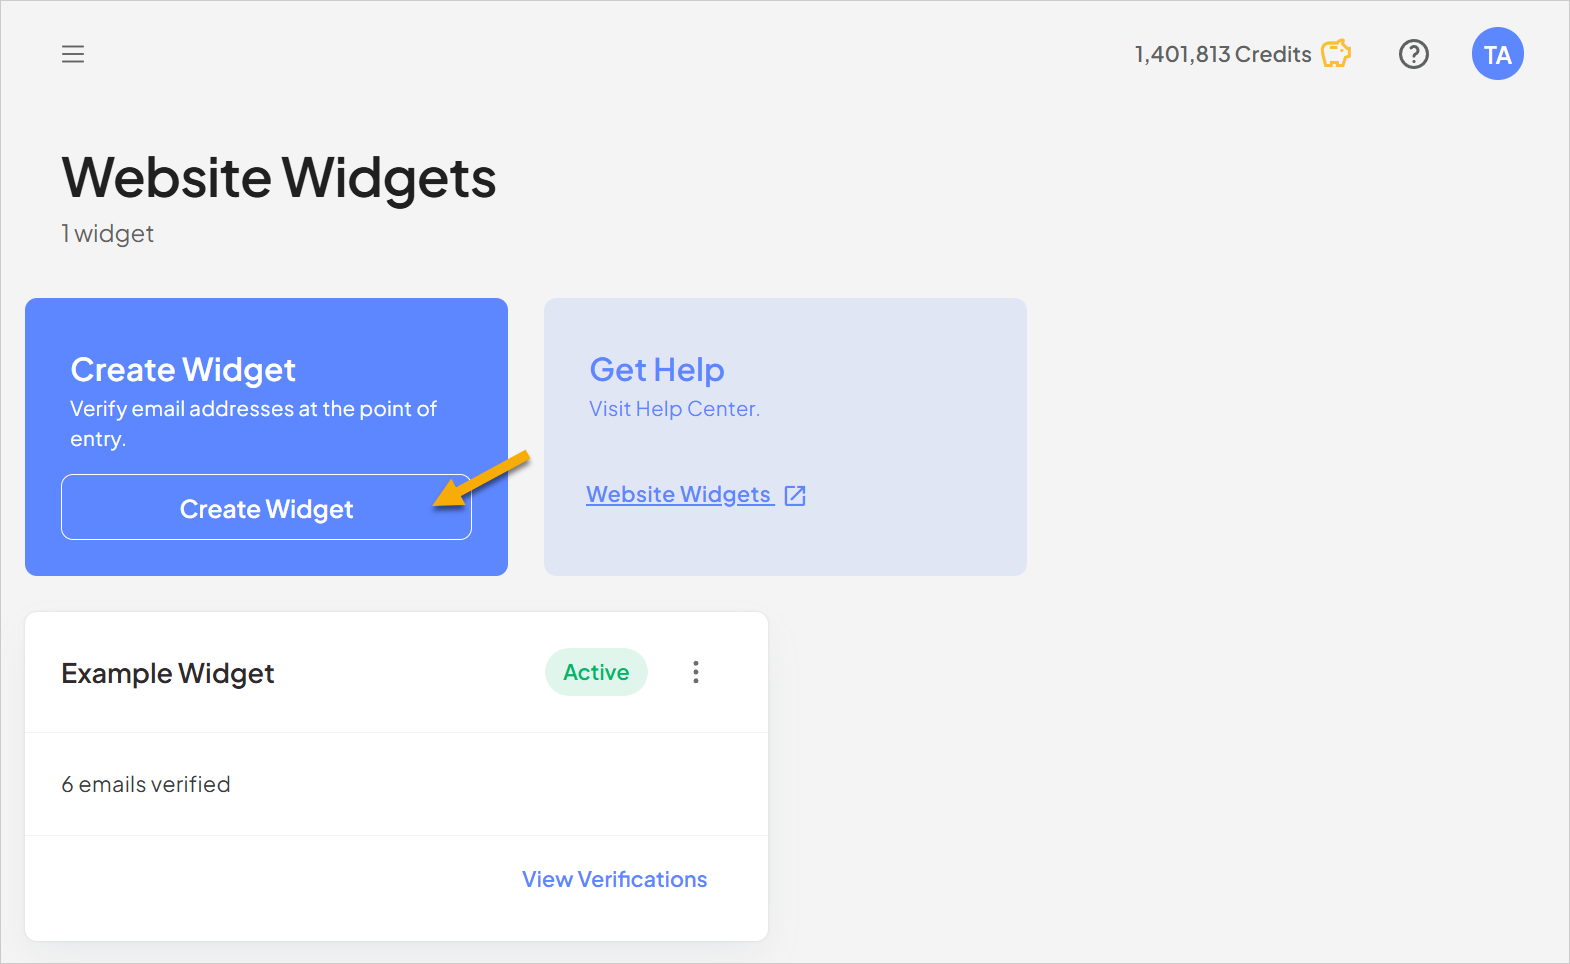
To create a widget for your website, click, Create Widget.
In the Widget dialog, enter a name for the widget in the Widget Title field.
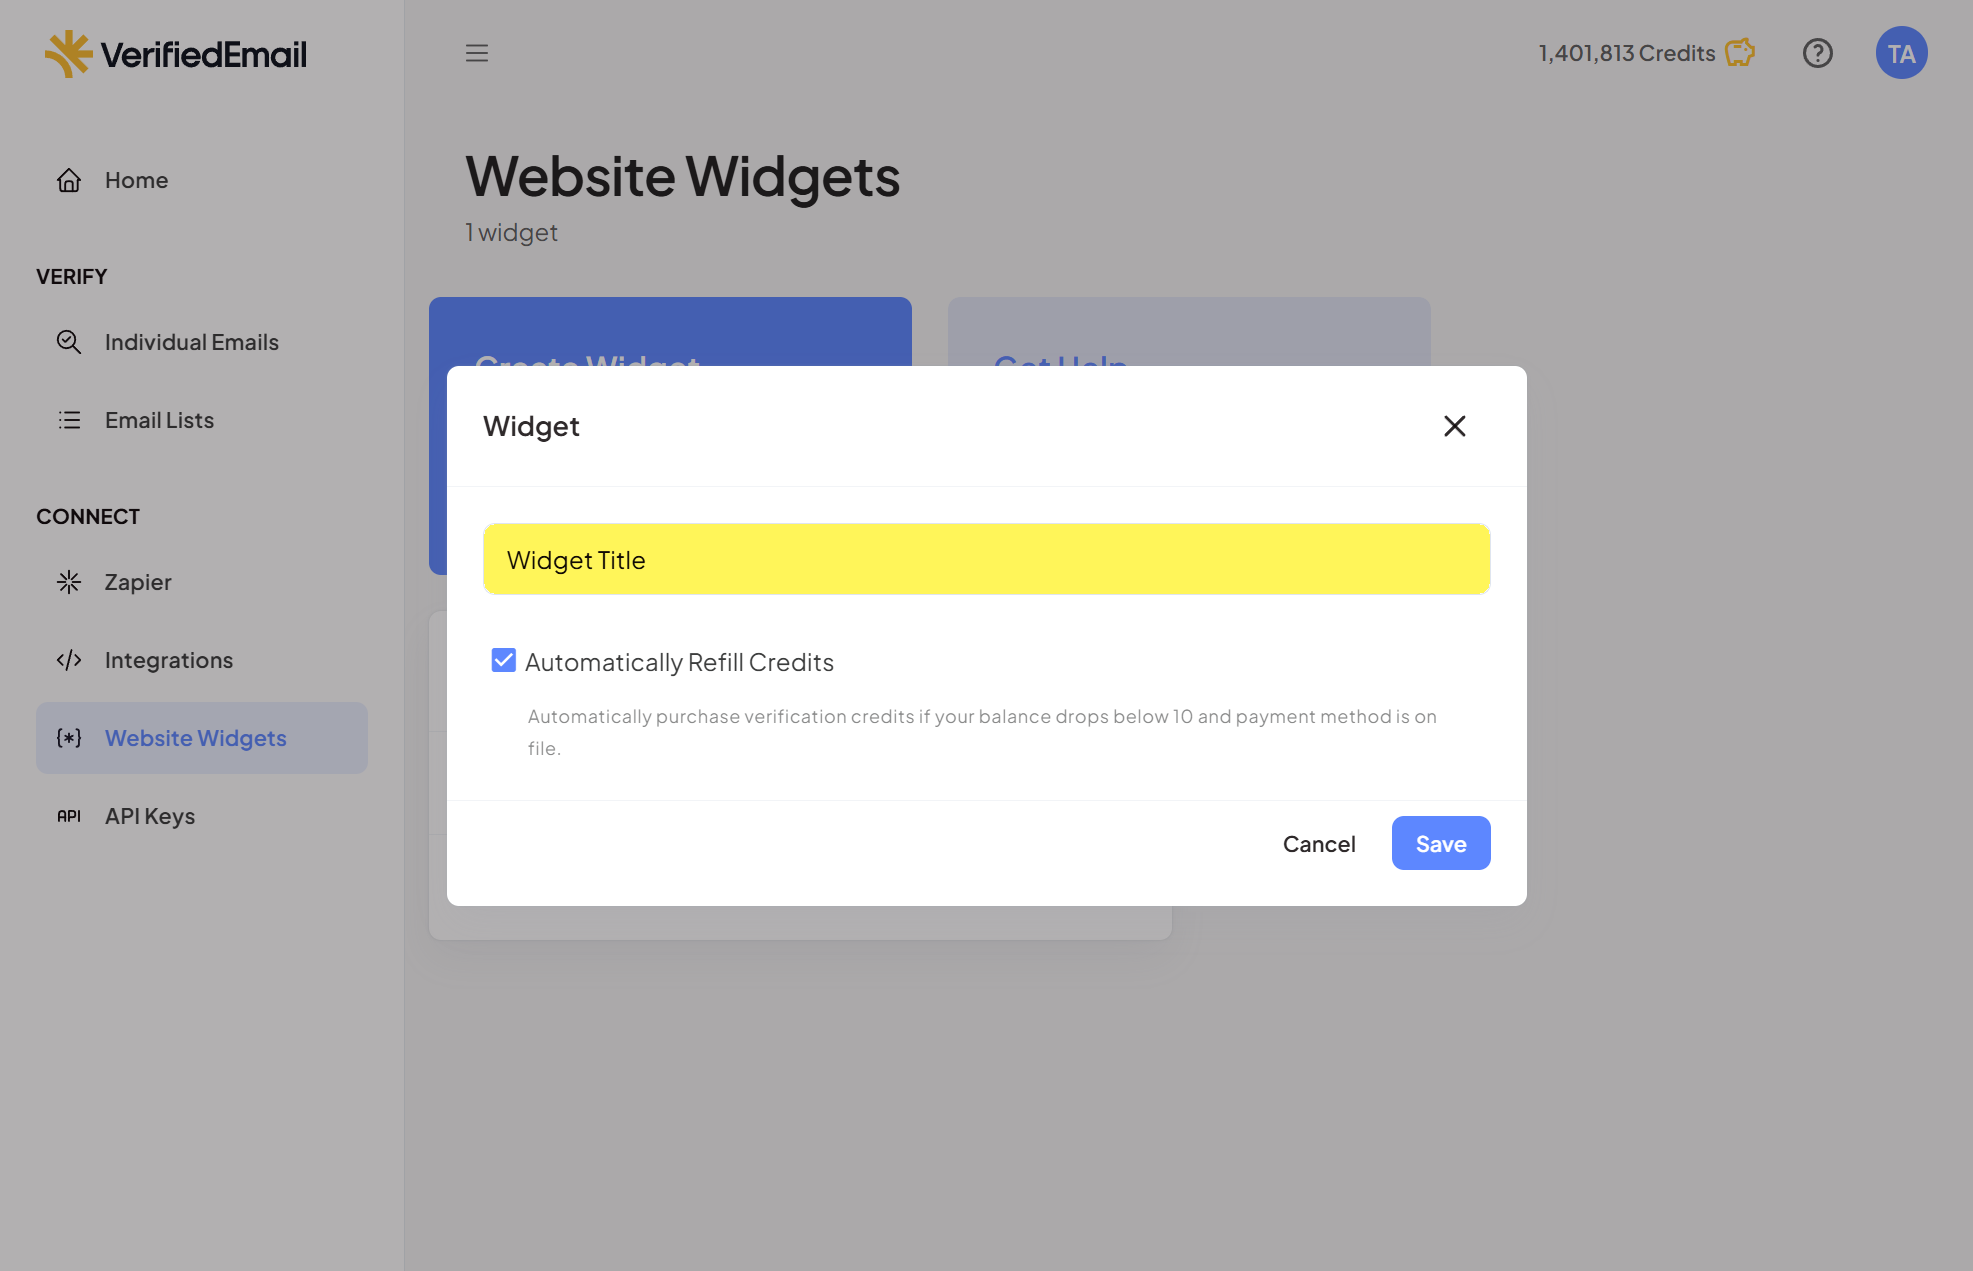
For verifications performed via your widget, you can choose to purchase more “Pay as You Go” credits automatically whenever they are needed (i.e., when you run out of available credits). This prevents the website widget from being interrupted and stopping email address verifications due to insufficient credits.
Click Save to continue.

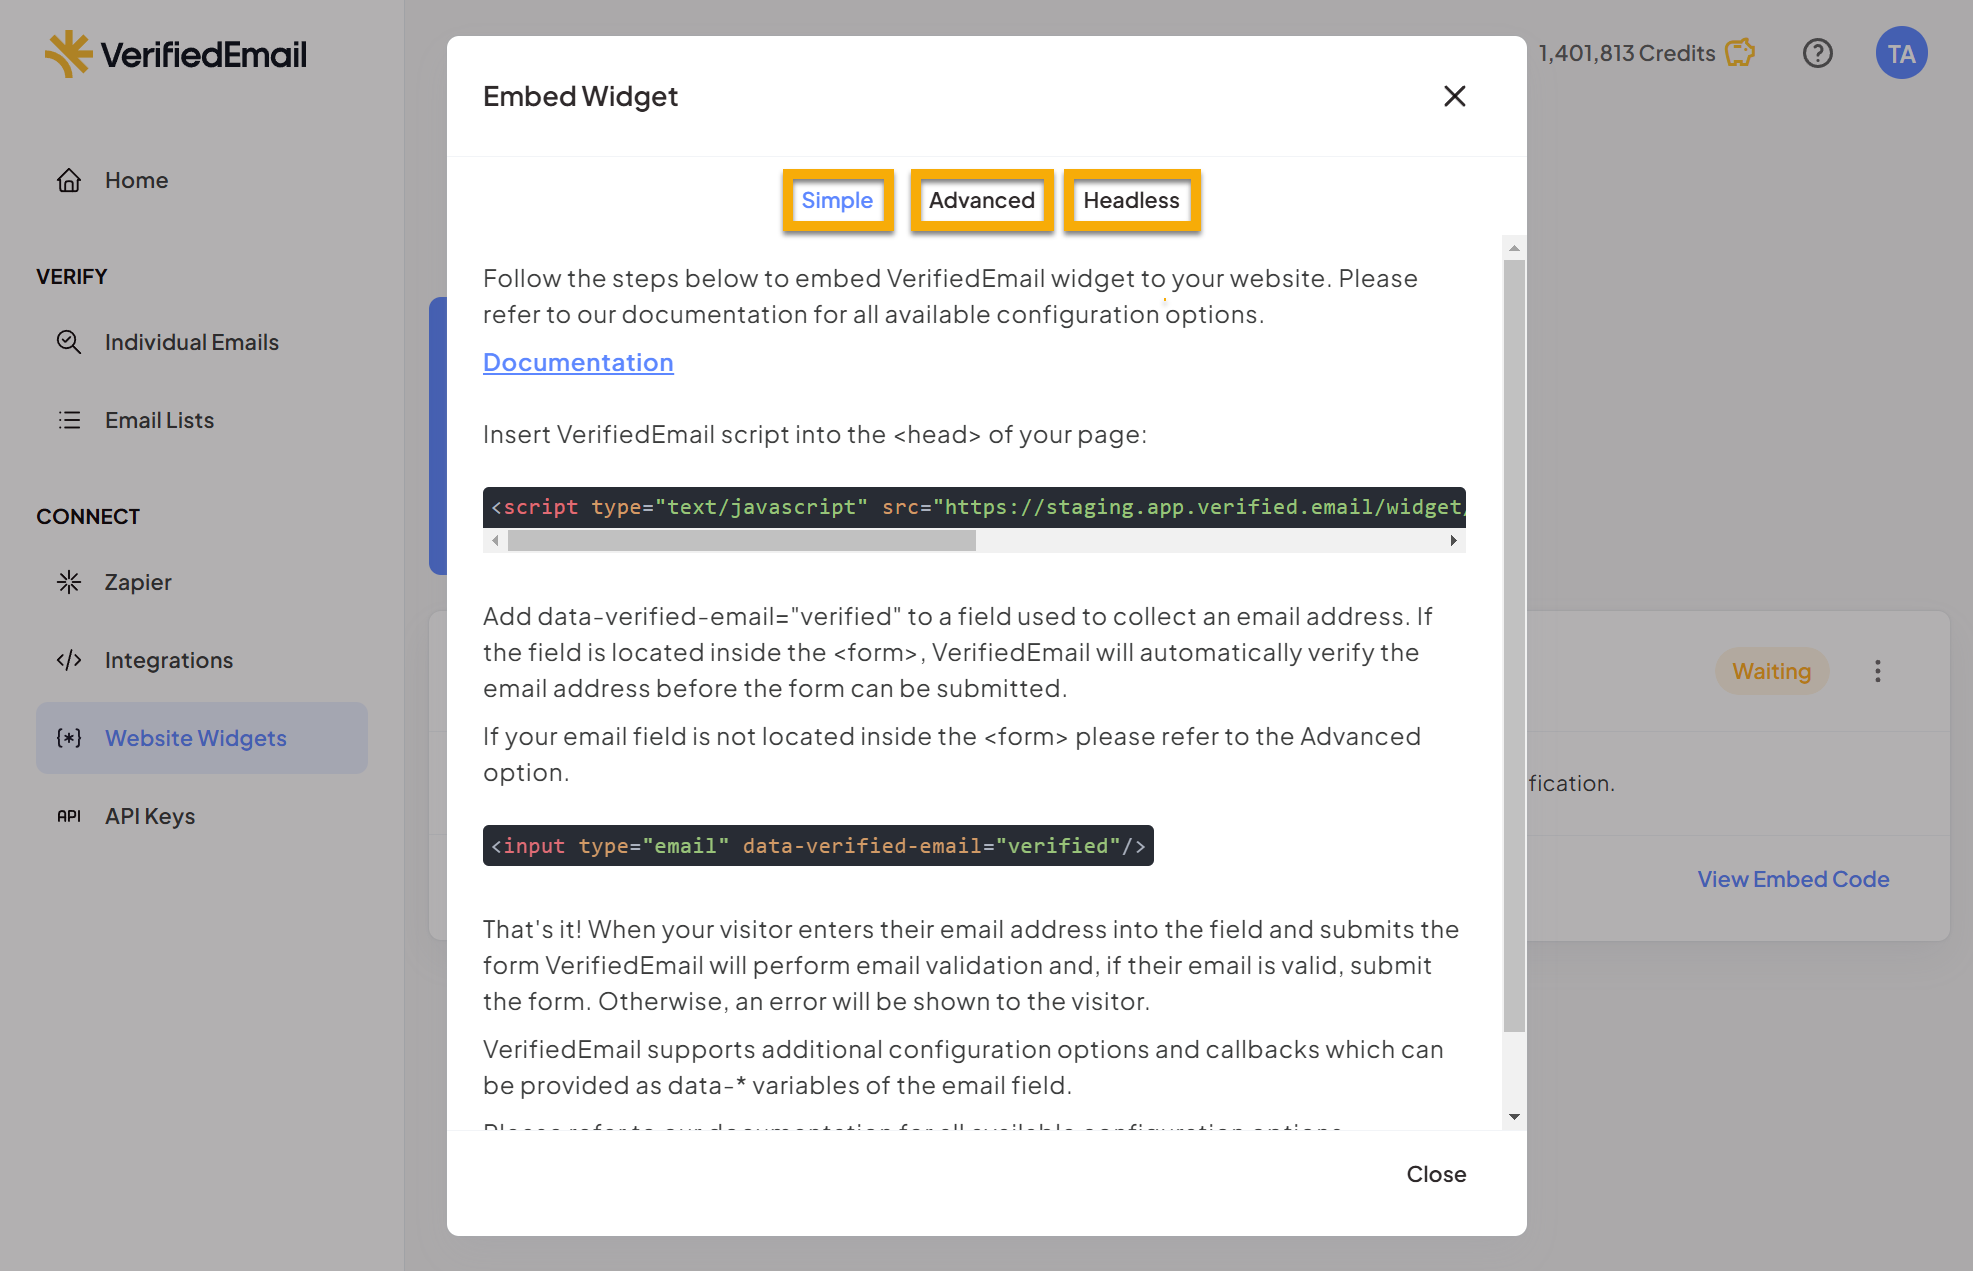
The Embed Widget dialog appears. This dialog includes the code you need to copy and paste to your website in order to embed the widget in your page.
VerifiedEmail offers three different implementations for website widgets: Simple, Advanced, and Headless.
The code required for each implementation varies. You can click any of the tabs at the top of the dialog to access instructions for the corresponding implementation method.
For more information, please see Widget Installation and Settings.
After copying and pasting the code for the selected implementation, click Close to close the Embed Widget dialog.

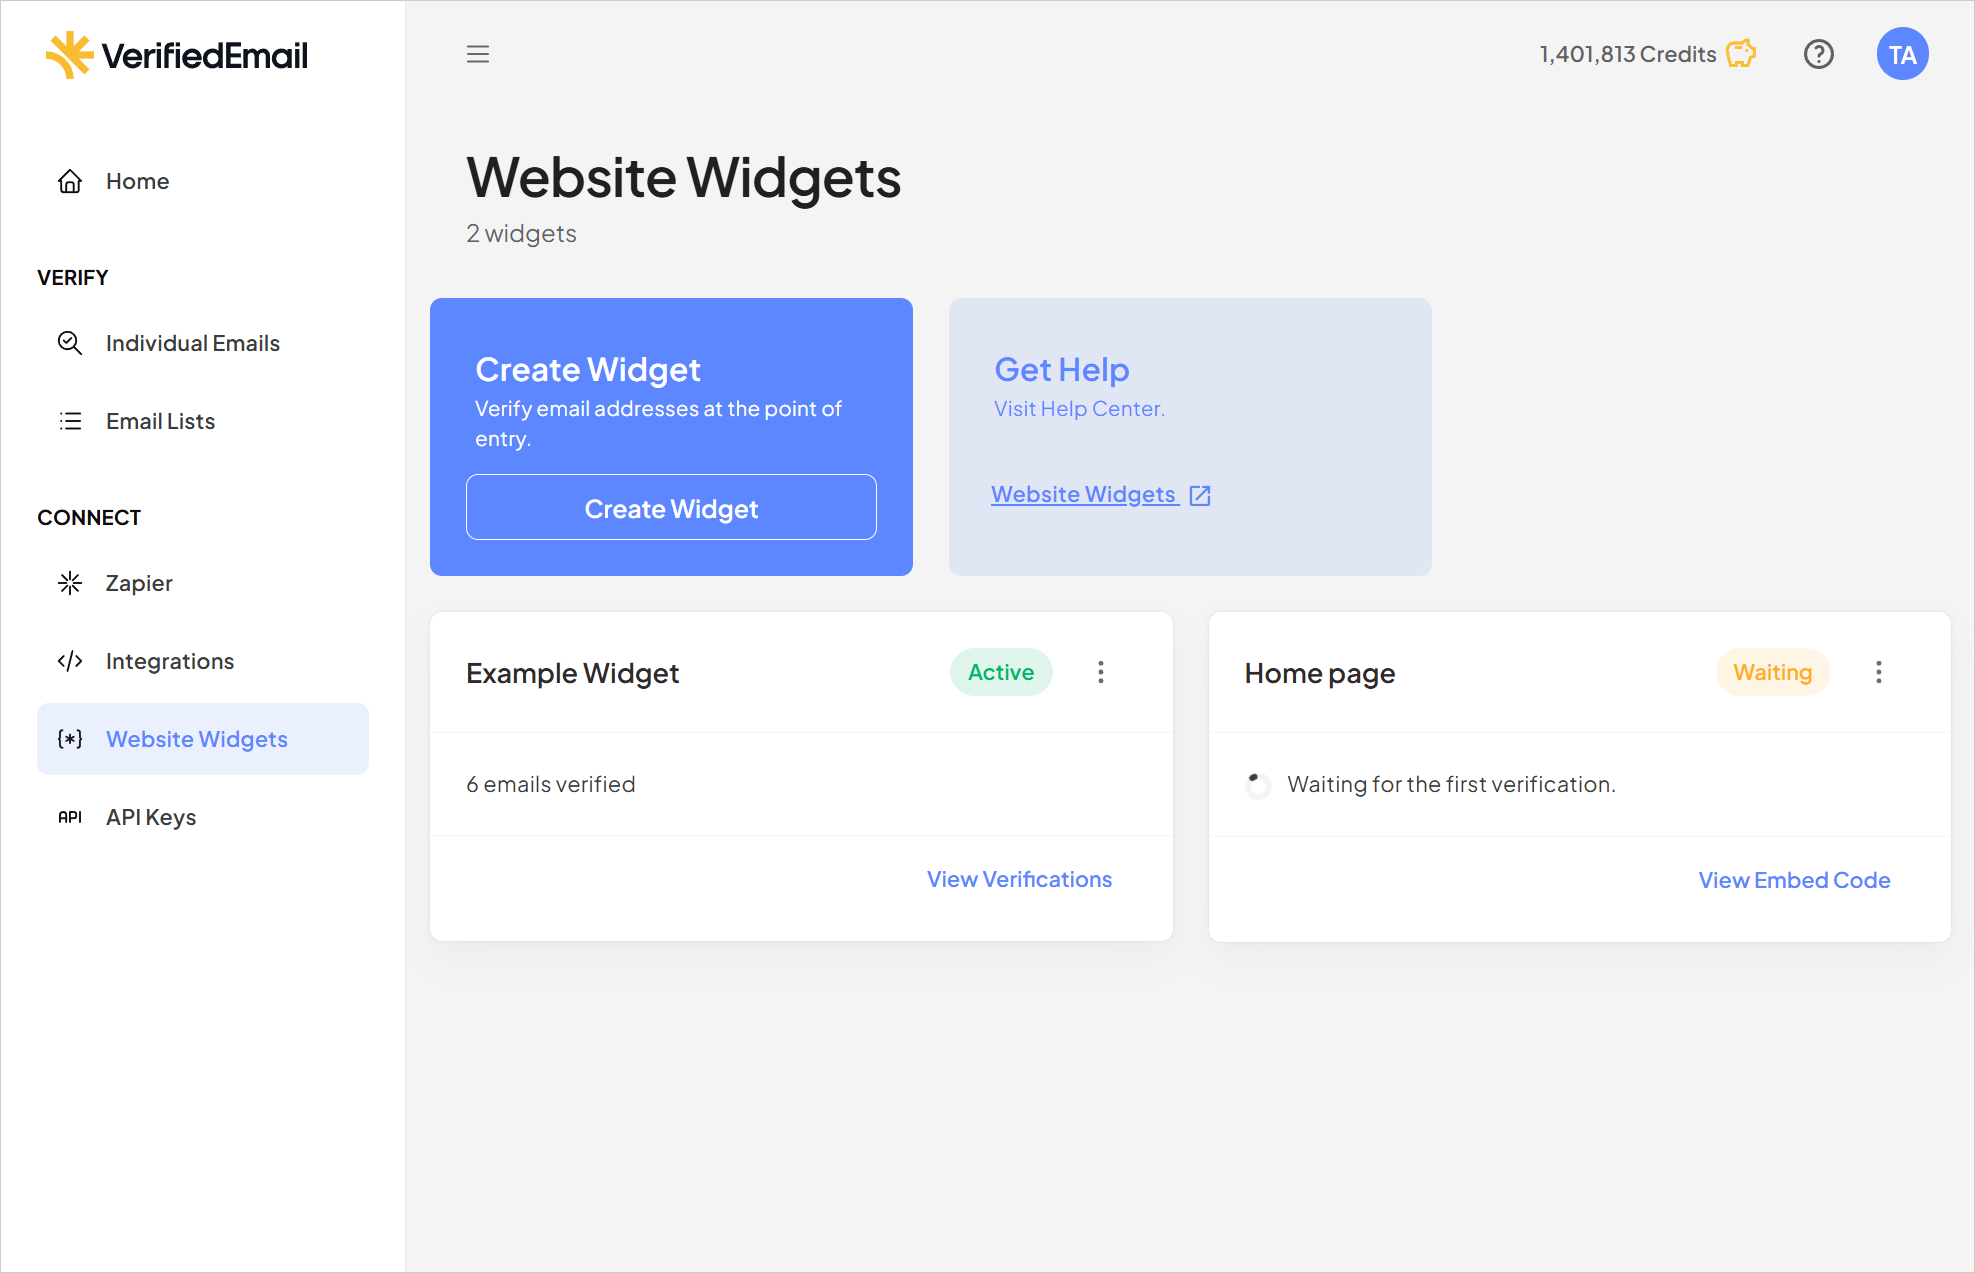
The new widget appears, with a status of Waiting.
Managing Website Widgets
In the card for each website widget, the status appears near the upper right-hand corner:
 | The widget is currently functioning and has performed verifications. |
 | The widget is ready to perform verifications but has not yet processed any (e.g., it may be awaiting implementation on your site). |
 | The widget has been permanently disabled and will no longer perform verifications. |
A context-specific link appears at the lower right-hand corner of each widget’s card:
- View Verifications - Clicking this link opens the dedicated email list for the selected widget. For more information, please see Verifying a List of Email Addresses.
- View Embed Code - Clicking this link opens the Embed Widget dialog for the selected widget, as described in the previous section of this article.
Editing Website Widgets
If you need to change the name, change the Automatically Refill Credits setting, or change the status of a widget, click the triple dot button at the upper right-hand corner of the widget’s card.
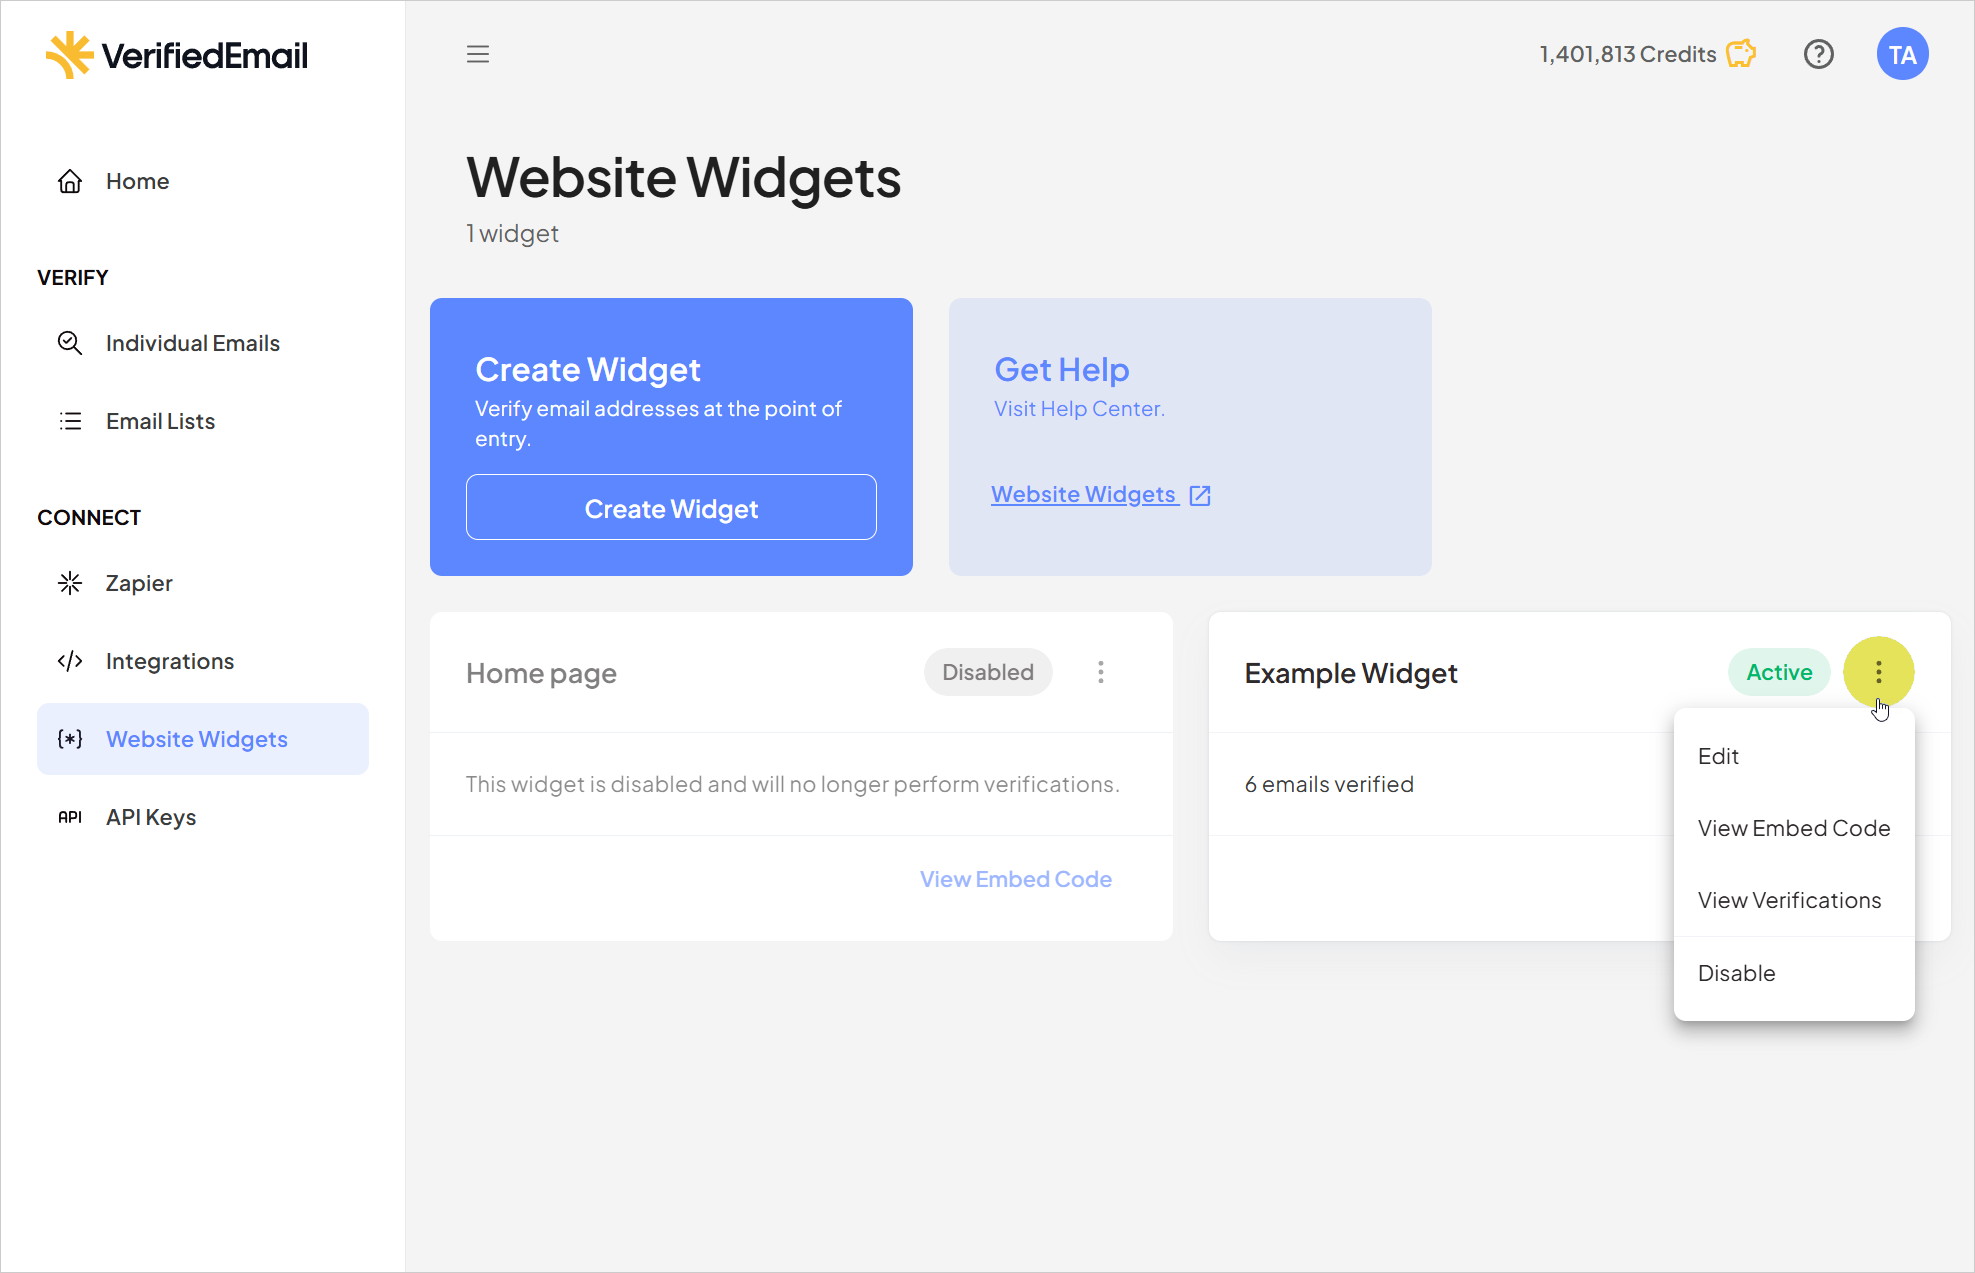
- Clicking Edit opens the same Widget dialog that appears when creating a new widget. You can make changes to the Widget Title or Automatically Refill Credits setting, and save your changes.
- Clicking Disable opens the Disable <widget title> confirmation dialog. If you are sure you want to permanently disable the widget, click Confirm.


